Trading Signals
On the previous page we added all indicators for the EA. If you want to edit your indicators, you simply go back and adjust your indicator’s parameters. Next, you can create the trading signals (‘signals’) you want to use for the opening or closing of an order. A signal is a group of conditions which have to be met before an order is opened or closed.
Get started
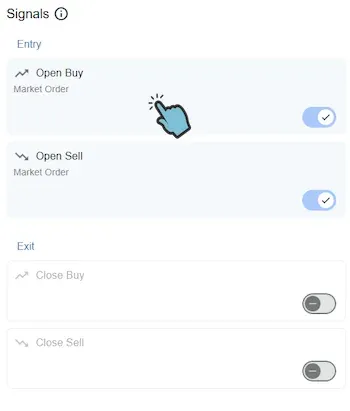
Section titled “Get started”Your EA has 4 signal types:
- Open Buy
- Open Sell
- Close Buy
- Close Sell
Signals are a very powerful tool to create almost any open and close logic you can think of. Creating a signal may seem quite difficult in the beginning, but we believe that anyone can learn it quickly. So please be persistent when learning how to create signals. You can always reach out to us if you don’t know how to proceed after reading the information on this page. Even when you think the signal editor is too limited, please reach out to us and we can show you how you can create your signal, as we have a lot of experience in solving complex scenario’s.
Edit a signal
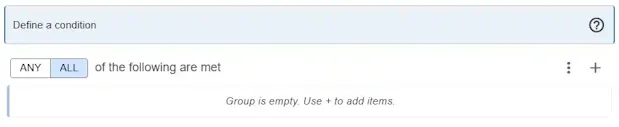
Section titled “Edit a signal”Click on a signal that you would like to edit. This will open the signal editor. If you started your EA based on a template then your signals may already contain some conditions. Other signals may be empty and so only contain an empty root group. If that’s the case, start by adding conditions to your signal.
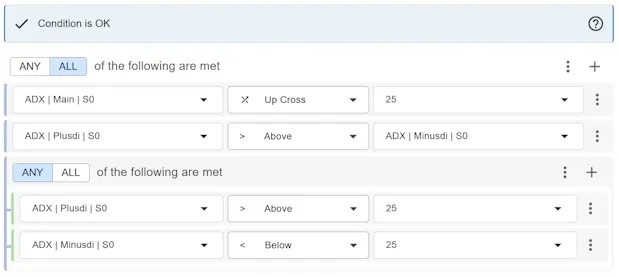
ANY | ALL Root Group
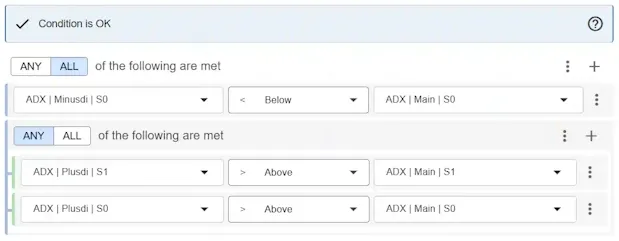
Section titled “ANY | ALL Root Group”After you’ve selected your order type, it’s time to configure your conditions. You’ll see the conditions start with a root group at the top. The root group gives you a choise between ANY/ALL. This option effects all conditions that are directly in this Group.
- ANY: Only one of the conditions has to be met for the signal to activate.
- ALL: All of the conditions have to be met for the signal to activate.
Start building your condition(s) from this root Group.
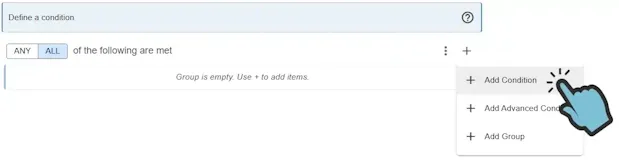
Add condition
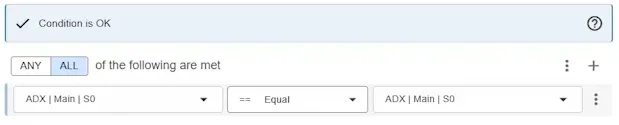
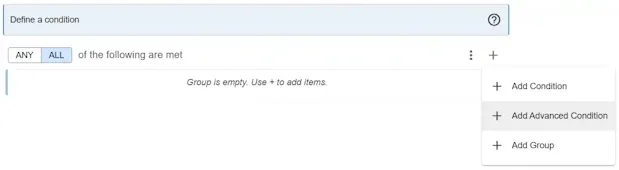
Section titled “Add condition”Open the options menu of a ANY | ALL group and select Add Condition. After you click Add Condition a simple condition will be added.
A condition is an expression with a Left-Hand side, an operator and a right Right-Hand side. By default, the Left- and Right-handside operands are indicators. The indicators you’ve added to your EA will appear here. You can replace the Indicator with a Function (Bid, Ask, Stoploss etc) or a constant value.
Toggle Indicator, Function or Constant
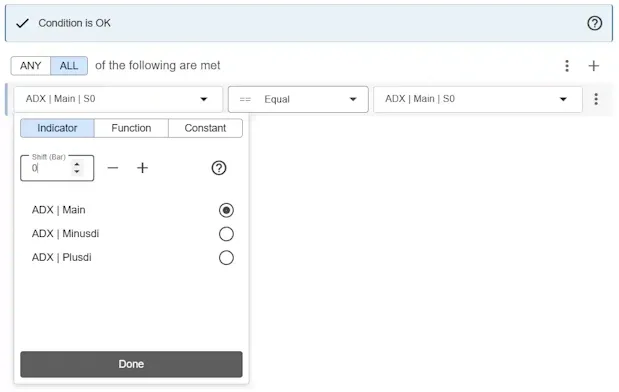
Section titled “Toggle Indicator, Function or Constant”You can toggle between an indicator, function or constant. Click on the element you would like to edit and a popup window will appear.
- Click on Indicator to access the indicators you have added to your EA.
- Click on Function to access functions like ask, bid, hour, minute etc.
- Click on Constant to add a constant (fixed) value. The default value is EMPTY which represents a MetaTrader empty value, which is a long number (2147483647).
You can edit constant values in MetaTrader via the Inputs tab. The input name will match the Input Name you specify in our web tool. Using the same Input Name multiple times within a signal or module will result in a single shared input in MetaTrader, which simplifies optimization.
Shift (Bar)
Section titled “Shift (Bar)”For each indicator you use in your condition you have to select the Shift you want to use. By doing this, you specify which bar’s value (of the indicator) you want to use.
- Shift (Bar): 0 - The current bar
- Shift (Bar): 1 - The previous bar
- Shift (Bar): 2 - The bar before the previous bar, etc.

Operator
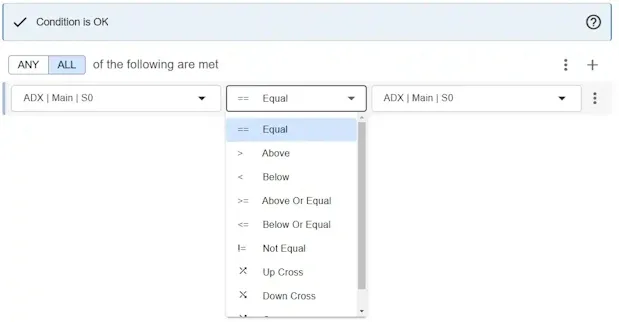
Section titled “Operator”There are three operator categories:
- Comparison
- Crossover
- Mathematical
Each category contains different operators. Depending on the context certain operator categories may not be available. Click here for a full list of available operators.
Add Advanced Condition
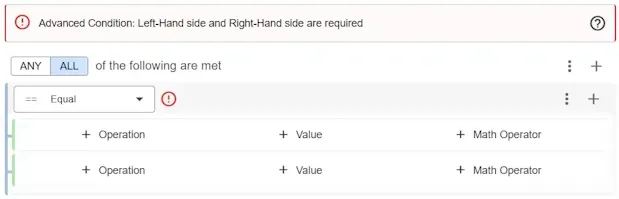
Section titled “Add Advanced Condition”If a simpel Condition does not meet your requirements you can add a Advanced Condition.
An Advanced Condition can contain various elements.
- Operation
- Value
- Mathematical Operator
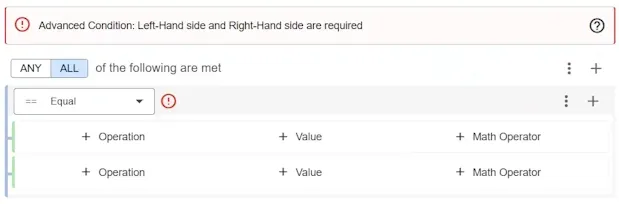
The Advanced Condition supports all the requirements you may have. Here you can apply complex mathematical operations if needed.
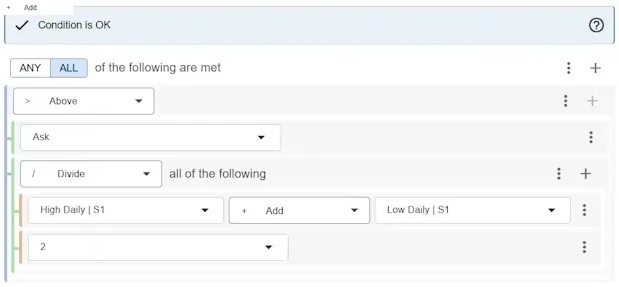
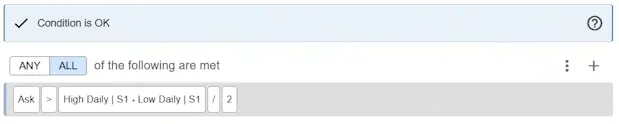
When you are done with the Advanced Condition it can be collapsed. A summary of your condition will be shown, this will help you to keep a good overview of your signal.
Add Group Any/All
Section titled “Add Group Any/All”You can add a nested Group of Conditions. Click on Add Group.
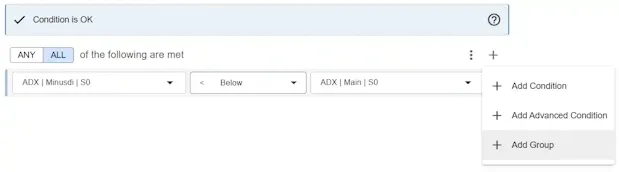
Here you can add more Condtions, Advanced Conditions or another nested Group.
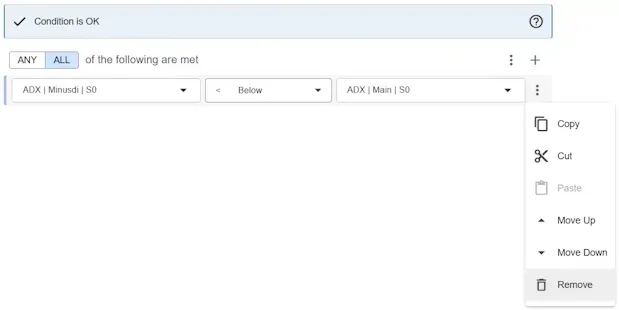
Remove node
Section titled “Remove node”You can remove a node by selecting “Remove” under options. The root Group (Any/All) can never be removed. Nested Groups can be removed.
Move | Cut-Copy-Paste
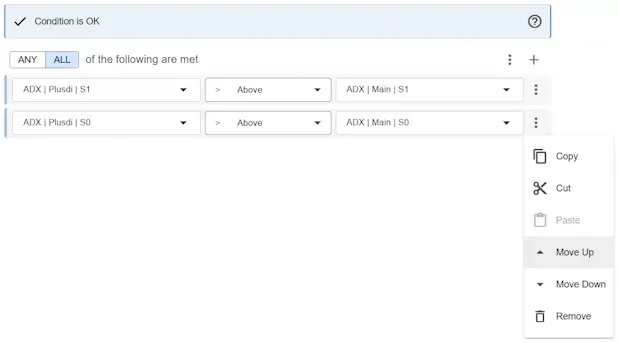
Section titled “Move | Cut-Copy-Paste”There are 2 ways to move elements.
- Move a condition Up/Down
- Cut and Paste
- Copy and Paste
Move a node within its container (Group or Advanced Condition) by opening the options menu. Click on Move Up or Move Down to move the element Up or Down in order.
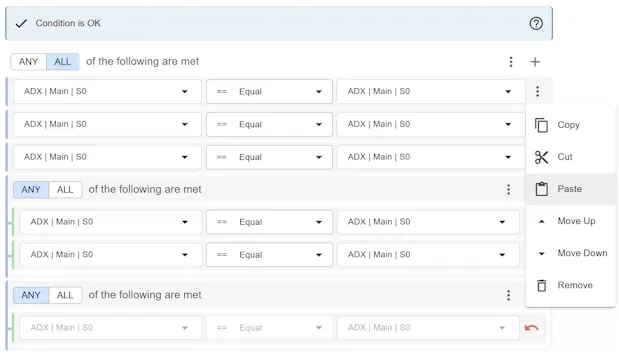
If you need to move a node to another container (Group or Advanced Condition), open the options menu and select Cut. The interface will be blocked for editing and you will be presented with options to paste your node. Click on the Paste button where you would like to move this item. The item will be moved to this location. Alternatively, you can use Copy instead of Cut to duplicate the node.
Invalid signals
Section titled “Invalid signals”When you are building signals you can create a signal that is invalid. Invalid signals cannot be saved. You know that your signal is invalid when you see the exclamation mark with an error message in the top summary box.
Nested conditions
Section titled “Nested conditions”You can make signals as complex as you would like. To easily understand how signals work, a good strategy is to divide them into groups. Each group results in conditions being met or not-met.